 Monster Hunter Wilds
Monster Hunter Wilds Guide for Beginners: Start Strong, Spend Smart, Learn the Hunt
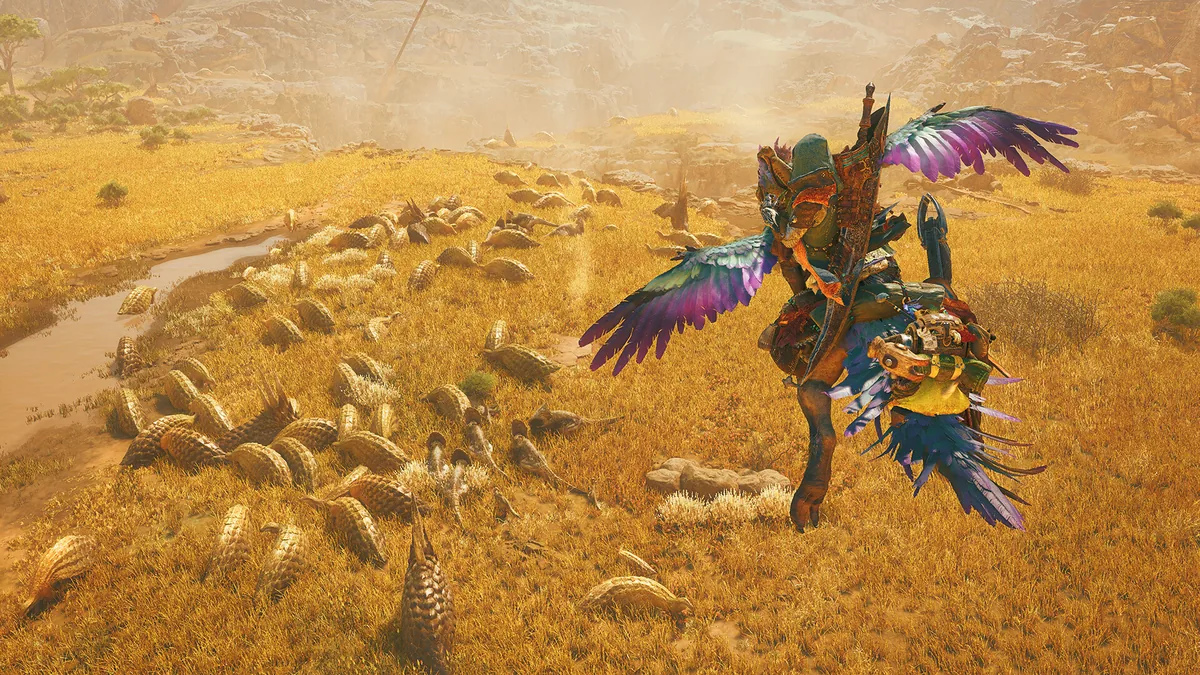
Quick Answer: This monster hunter wilds guide for beginners shows you how to survive the first hour, prioritize resources, avoid common early mistakes, and recognize when you’re ready to move past the beginner phase.
Monster Hunter Wilds is a 2025 action RPG from Capcom that launched worldwide on February 28, 2025 for PlayStation 5, Windows, and Xbox Series X/S with cross-platform play Source. The game frames its world around shifting environments and relentless hunts, so the best early-game approach is to stabilize your loadout, learn your weapon loop, and keep your spending conservative while you build consistency Source.
First-Hour Checklist
Your first hour should be spent unlocking basic systems, settling on one weapon, and avoiding wasteful upgrades. The goal is not to “clear content fast” but to remove friction so every later hunt teaches something instead of punishing confusion.
1. Finish the opening tutorial sequence
Start by pushing through the initial story beats and any mandatory tutorial hunts. In Monster Hunter, the opening section usually introduces movement, attack timing, item use, and the quest loop through guided encounters rather than freeform experimentation. Pay attention to the parts that look obvious, because they often hide the most important fundamentals: how the camera behaves during combat, how item radial menus or quick-use slots work, and how the game communicates quest completion.
Examples of what to lock in here:
- Learn how to read the monster’s tells before committing to a full combo.
- Practice sheathing and repositioning instead of over-attacking.
- Notice when the game lets you restock, craft, or swap gear between hunts.
2. Pick one weapon and stay with it
Choose one weapon class and keep it for the first several hunts. Early confusion usually comes from switching too often, not from picking the “wrong” weapon. A beginner gets more value from learning a simple loop on one weapon than from half-learning three.
Good first-hour choices are usually the weapons with clear timing and forgiving spacing. For example:
- Great Sword teaches deliberate positioning and punish windows.
- Sword and Shield rewards mobility and item access.
- Dual Blades emphasizes aggression and stamina discipline.
The real objective is to build muscle memory. If a monster punishes you, you should be asking whether your spacing was bad, not whether your weapon was bad.
3. Read every control prompt once, then stop fighting the interface
Monster Hunter games reward players who understand their own control scheme. During your first hour, open the control help, map your basic actions, and verify where healing, dodge, guard, and weapon swap live. If the game offers camera or sensitivity options, tune them immediately so the default setup does not sabotage your reactions.
Useful early adjustments:
- Raise camera sensitivity if you feel late tracking large monsters.
- Lower any setting that makes cursor or menu movement feel sluggish.
- Test item shortcuts in a safe zone before you need them mid-hunt.
4. Gather everything, but do not hoard everything
Pick up common materials, mining nodes, and environmental resources during your first hunts, but do not clog your pouch with items you do not yet understand. Early gathering matters because it teaches the map and prepares you for crafting, yet overfilling your inventory creates the wrong habit: carrying junk instead of returning to build with intent.
Examples of what to collect early:
- Healing ingredients and basic recovery items.
- Ore, bone, and other baseline crafting materials.
- Anything the game specifically highlights as a key progression resource.
5. Take the first easy hunts and learn one monster pattern
Your first few hunts should be low-pressure repetitions, not heroic tests. Fight one or two accessible monsters until you can identify opening attacks, recovery windows, and the moment the fight becomes unstable. If a hunt feels chaotic, that is usually a sign you are attacking too much or repositioning too little.
A good early training loop looks like this:
- Start the quest.
- Observe the monster for a few seconds.
- Punish only after obvious recovery.
- Heal before your health is critical.
- End the hunt with enough resources left to repeat it.
6. Check every early vendor and forge equivalent
Spend your first hub visits comparing gear and services instead of rushing into another mission. Monster Hunter progression often hides value in the early shop loop: better armor skills, basic consumables, and crafting ingredients matter more than a flashy weapon upgrade you cannot support yet.
Look for:
- Armor pieces that improve survivability.
- Ammo, coatings, or consumable materials if your weapon uses them.
- Any service tied to trade, item management, or field support.
7. Save your first rare materials
When the game hands you something that looks uncommon, do not spend it impulsively. Early rare materials often gate stronger gear lines, and new players commonly burn them on the first available craft because the UI makes the upgrade look urgent. It usually is not.
A better pattern is:
- Keep one copy unless you are sure the craft is a direct upgrade.
- Compare the new piece against your current armor or weapon path.
- Prioritize consistency over novelty.
Resource Priority Order
Your early resource priority should favor survival, flexibility, and clean upgrades, not the biggest immediate damage number. In a Monster Hunter-style economy, beginners lose progress by over-investing in the wrong items, especially if they treat every new material like it must be spent immediately.
| Priority | Spend or Hoard | Why it matters early | Typical examples |
|---|---|---|---|
| 1 | Hoard | Rare upgrade materials | Monster-specific drops, low-availability parts |
| 2 | Spend | Basic healing and recovery stock | Potions, antidote-type cures, stamina support |
| 3 | Spend | One weapon path | Upgrading the weapon you are actually using |
| 4 | Spend | One survivability armor set | Pieces that improve defense or comfort |
| 5 | Hoard | Situational crafting mats | Trap components, elemental swaps, niche ammo |
| 6 | Hoard | Duplicate gear ingredients | Anything you do not yet know you need |
The first thing to buy or craft is usually not more damage, but more uptime. If you can stay in the hunt longer, you learn faster and fail less often. A beginner’s economy should be built around three pillars: healing, one weapon line, and one armor set that lets you live through mistakes.
What to spend first
Spend on your core healing stack, then on your main weapon, then on armor pieces that give you straightforward value. If a weapon upgrade improves raw attack but strips away your ability to maintain the fight, it is not the correct early investment. The same is true for armor that looks impressive but forces you into a playstyle you cannot yet execute.
Spend early on:
- Healing and recovery items.
- Weapon upgrades that preserve your preferred pace.
- Armor that gives reliable defense or comfort.
What to hoard first
Hoard anything that feels uncommon, gated, or hard to replace. This includes rare monster materials, special upgrade parts, and any item you have only seen once or twice. Many new players create a resource bottleneck for themselves by using their first rare drop on a sideways upgrade. The better move is to keep those materials until you know which weapon class and armor route you actually want.
Hoard:
- Rare monster parts.
- Limited-use crafting components.
- Any item with a low drop frequency or unclear source.
What to craft first
Craft the consumables you will use every hunt. If the game supports crafting recovery items or utility tools from common materials, that is usually the strongest early loop because it converts map time into hunt consistency. In practical terms, your first crafts are often better spent on healing support and quest utility than on vanity upgrades.
Craft first:
- Core healing items.
- Status cures relevant to the monsters you are fighting.
- Utility tools that create safe openings or reduce risk.
What not to chase yet
Do not chase every elemental variant, every weapon branch, or every armor set bonus in the opening hours. That is a late-beginner habit, not a starting one. You need one working loadout before you need a second one. The early game is about narrowing variables, not expanding them.

You might also like
- monster hunter wilds title update 2 release date: Patch Notes Explained for Monster Hunter Wilds
- monster hunter wilds update 4 performance explained: what changed in Title Update 4
- Monster Hunter Wilds Title Update 5 Patch Notes Explained
- monster hunter wilds title update 2 Explained
- Monster Hunter Wilds Switch Axe Build Guide
Common Mistakes
New players usually fail because they misread Monster Hunter as a standard action game instead of a preparation-and-punish game. The fixes are simple, but only if you identify the pattern early.
Overcommitting to long combos
- Why it happens: The combat feels smooth, so players assume finishing the full string is always optimal.
- Fix: Stop after the first safe hit or two unless you have already seen the monster’s recovery window.
Changing weapons every few hunts
- Why it happens: Early weapons all look appealing, and players think experimentation equals progress.
- Fix: Lock one weapon for several hunts and only swap after you understand its core loop.
Spending rare materials too early
- Why it happens: The first upgrade screen makes every material look urgent.
- Fix: Keep one copy of uncommon drops until you know the next craft is a real upgrade.
Ignoring item management
- Why it happens: Early hunts are forgiving, so inventory discipline feels optional.
- Fix: Refill healing items after every hunt and keep your pouch organized before leaving camp.
Fighting while low on health because “one more hit” feels close
- Why it happens: Players overestimate how much room they have before a cart.
- Fix: Heal sooner than feels necessary, especially after a monster enters a more aggressive phase.
Staying glued to the monster’s front arc
- Why it happens: New players want to see the target and attack head-on.
- Fix: Reposition to the side or rear when the monster starts a predictable swing chain.
Common Mistakes
This section is the practical version of the beginner trap list: the mistake, the reason it happens, and the fix that actually changes outcomes.
1. Treating every hunt like a damage race
Players often think success comes from hitting harder and faster. In reality, the hunt is won by choosing the right openings and not wasting recovery windows. The fix is to delay attacks until you can name the monster’s punish window in your head.
2. Ignoring armor comfort
A lot of beginners wear the gear with the biggest visible number and ignore how it changes their survivability or stamina flow. The fix is to favor armor that keeps you alive long enough to learn the fight, even if the offense looks smaller.
3. Entering hunts underprepared
This happens because the quest prompt feels like a direct action queue, not a preparation check. The fix is to restock healing, confirm your weapon is repaired or upgraded, and make sure your pouch has the tools you rely on.
4. Fighting the camera instead of the monster
Large creatures and tight spaces can make the camera feel like the enemy. The fix is to adjust camera sensitivity early and use manual repositioning after every big dodge or roll.
5. Spending every new resource immediately
Beginners often convert drops into gear the moment they receive them, which creates weak long-term progression. The fix is to hoard rare parts until you can compare at least two meaningful upgrade paths.
6. Assuming one failed hunt means the build is wrong
A single loss usually says more about execution than about setup. The fix is to review what actually failed: healing timing, stamina use, spacing, or overextension. Adjust one variable at a time.
Pro Tips
These are the habits that separate a clean beginner run from a messy one. They matter because they make the game less punishing without requiring advanced mechanics knowledge.
Tip 1. Heal at the first bad exchange, not the third
If a monster lands a clean hit and you are already below comfortable health, reset the fight mentally and heal right away. Waiting for a “better moment” usually means you are gambling on a window that will not appear.
Tip 2. Use the terrain as a positioning tool
When a hunt opens in a wide area, move so the monster has to turn toward you before it can attack. That small delay creates safe time for lining up your next move, especially against large or fast-moving targets.
Tip 3. Track which attacks force a real reset
Every monster has a few moves that should make you stop attacking and relocate. Once you identify those attacks, the whole hunt becomes clearer because you stop pretending every animation is punishable.
Tip 4. Build one “default” loadout and one “problem solver” loadout
Your default set is for ordinary hunts, while the second set handles status-heavy or endurance-heavy fights. A beginner does not need ten presets, but two disciplined setups are better than one messy general-purpose pile.
Tip 5. Save your strongest consumables for the point of control loss
Use traps, boosts, or rare utilities when the fight starts slipping, not when the monster is already nearly done. That is when those items create the most value because they prevent a wipe, not just accelerate a win.
Tip 6. Rehearse the first 30 seconds of a hunt
The opening seconds often decide whether you enter the fight cleanly or get bullied immediately. Practice spawning in, finding the target, and approaching without panic so you start every hunt with intent instead of improvisation.
Graduation Threshold
You are out of the beginner phase when you can win ordinary hunts without depending on panic healing, menu confusion, or random damage. That threshold is less about story progress and more about whether your decisions are deliberate.
Three concrete signs usually show you have crossed it:
- You can identify when to attack and when to stop on sight.
- You no longer blow your early resources on impulse crafts or upgrades.
- You can complete a hunt, refill, and re-enter another without feeling lost in the menus.
Examples of beginner-phase exit conditions:
- You know what your weapon does in neutral, on punish, and while disengaging.
- You can handle a standard monster without burning every consumable.
- You have one stable loadout and at least a second one for specific threats.
A practical way to test yourself is to ask whether a missed opening still causes a collapse. If a single mistake still sends you into scramble mode, you are still in the beginner phase. If a mistake costs you tempo but not the entire hunt, you are moving into the next layer of play. That is the point where you can start reading more specialized build or monster-specific advice with real benefit.
Next-Step Internal Links
Once the basics are stable, the best follow-up guides are the ones that deepen your weapon choice, armor planning, and campaign pacing.
- Weapon Tier Guide for choosing a main weapon after the first few hunts
- Best Early Builds for survivability and damage routing without wasting materials
- Main Story Walkthrough for quest order and progression checkpoints
- Armor Skills Explained for understanding what actually matters on gear
- Monster Weakness Guide for targeting the right parts and elements
- Hunting Base Camp Guide for inventory, restock, and prep workflow
Related Guides
- Monster Hunter Wilds Weapon Tier Guide
- Monster Hunter Wilds Best Beginner Weapons
- Monster Hunter Wilds Early Game Builds
- Monster Hunter Wilds Armor Skills Guide
- Monster Hunter Wilds Main Story Walkthrough
- Monster Hunter Wilds Monster Weakness Chart
- Monster Hunter Wilds Item and Crafting Guide
- Monster Hunter Wilds Combat Basics Guide
Sources
- https://fextralife.com/monters-hunter-wilds-[beginners](/guides/monster-hunter-wilds-tips-for-beginners)-guide-tips-tricks-for-all-players/
- https://en.wikipedia.org/wiki/Monster_Hunter_Wilds
- https://store.steampowered.com/app/2246340/
See also
- Monster Hunter Wilds Sword and Shield Build Guide
- Monster Hunter Wilds patch performance: Patch Notes Explained
- Monster Hunter Wilds Walkthrough Part 1
- Monster Hunter Wilds Best Dual Blades Build Guide
- Monster Hunter Wilds next update patch notes explained
- Monster Hunter Wilds monster hunter wilds update schedule Patch Notes Explained
- Monster Hunter Wilds update today: Patch Notes Explained for the latest news
- Monster Hunter Wilds performance update explained: what changed in the latest patch
- Monster Hunter Wilds Build for Gogmazios
- Monster Hunter Wilds title updates explained: what changed across the roadmap
Screenshots



Reviewed by
MH Wilds Guides Editorial
Expertise: Editorial team behind MH Wilds Guides. Content is compiled from official patch notes, community wikis, and playthrough notes, then reviewed and updated on schedule.
Sources
Monster Hunter Wilds Monsters Guides →
Browse the complete monsters collection and its focused guides.
Related Guides


🔥 Popular Guides
Monster Hunter Wilds Tier List
Monster Hunter Wilds tier list with S/A/B rankings, matchup notes, methodology, and patch context for current-meta hunting.
Monster Hunter Wilds update ps5 pro: Patch Notes Explained
Patch notes explained for Monster Hunter Wilds update ps5 pro, covering version milestones, buffs, nerfs, and what to change today.
monster hunter wilds title update 4 release date: Patch Notes Explained
TU4 released Dec. 15, 2025 at 11PM ET with Gogmazios, endgame quests, weapon balance, and event content.
Monster Hunter Wilds Gameplay Walkthrough
Complete walkthrough with preparation, hunts, tough sections, rewards, tips, and FAQ for Monster Hunter Wilds gameplay.
📋 Patch Notes & Updates
🛠️ Popular Tools
Was this guide helpful?
Rate this guide so we can improve it.
Share your own tip
Found something not in the guide? Submit it below — our editors review every tip before publishing. No account required.